micro:bit Christmas Wreath Lights

Implementing a low-power solution to turn a set of LED Christmas lights on and off during a user-specified timeframe.
Table of Contents
Design choices
- Used micro:bit as the other option was a Raspberry Pi 2, which would have consumed more battery and would have been too heavy for the wreath
- Used blocks in the MakeCode editor 1, for accessibility
- Track 3 things: current time, on/start time and off/end time
- Only use hours for start/end time, to keep the user interface simple
- Allow manual override (mostly for testing)
- The initial idea was to provide this over a simple server and web GUI, but I didn’t have a Wi-Fi card for the micro:bit
- Use the micro:bit LED display
- Minimal text to avoid scrolling (prefer icons)
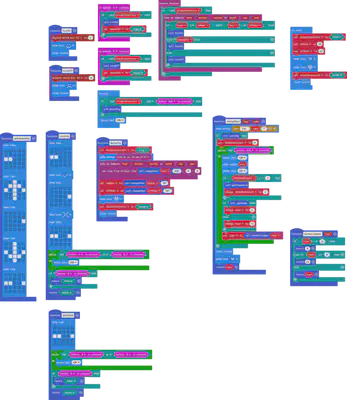
Progress
Turning things on and off (On the breadboard)
- Built the basic on/off functionality first using one LED, using Pin 16 and the GND
- A for ON, B for OFF - this later became the manual override
- Clicking each button rendered a happy/sad face on the micro:bit display to provide user feedback
Automating according to time
- Used the micro:bit time library 2 to track the time
- Two variables track an “ON” time and “OFF” time (hour only)
- Every minute, depending on the current time, the lights are switched/stay on or off
Configuration UI
This was the longest part to write
// Used to constrain input hour input
// This could be simplified as "Math.abs(hour) % 24"
function normaliseHour (hour: number) {
    if (hour > 23) {
        return 0
    } else if (hour < 0) {
        return 23
    }
    return hour
}

function changeHour (hour: number, name: string) {
    // Minimal text used - the less scrolling, the better
    basic.showString("SET " + name + "?")
    if (yesOrNo()) { // Custom UI element, returns true (yes) or false (no)
        helpShownCount = 0
        while (!(input.buttonIsPressed(Button.AB))) {
            // Pausing so that A+B input can be detected, which will move to next setting
            basic.pause(100)
            basic.showNumber(hour)
            basic.pause(100)
            // Only show UI how-to guide once (otherwise would be called on every increment/decrement)
            if (helpShownCount < 1) {
                upOrDownHelp()
                helpShownCount += 1
            }
            if (upOrDown()) { // Custom UI element, returns true (up) or false (down)
                hour += 1
            } else {
                hour += -1
            }
            hour = normaliseHour(hour)
        }
    }
    // End with a heart icon!
    basic.clearScreen()
    basic.showIcon(IconNames.SmallHeart)
    return hour
}
Testing & Tweaking
- Considered an approach where micro:bit used to relay AA battery supply, used normal AAA battery for micro:bit + lights… for now
- Pin 16 determined to be rubbish, used Pin 2 as more easily reachable - cross checked with the micro:bit website 3
- Duct tape used to tape wires through the crocodile clip loops
- Flashed some final tweaks to print 24 hour current time correctly and some defensive coding to ensure hour value input is $0 \leq t \leq 23$.

Next Steps and Future Work
- Could refactor hour normalisation to use modulo 24
- Allow setting of minutes for the current time
- Improve UI to shorten text and make navigation faster
- Buy some card and make a battery pack holder 4
- Install Wi-Fi card and implement localhost web-based interface
Timothy Clark
Software Engineer & Writer
Writer and speaker on cybersecurity, software engineering, and early careers.